Stack and Slash Pillow
By Shannon and Jason
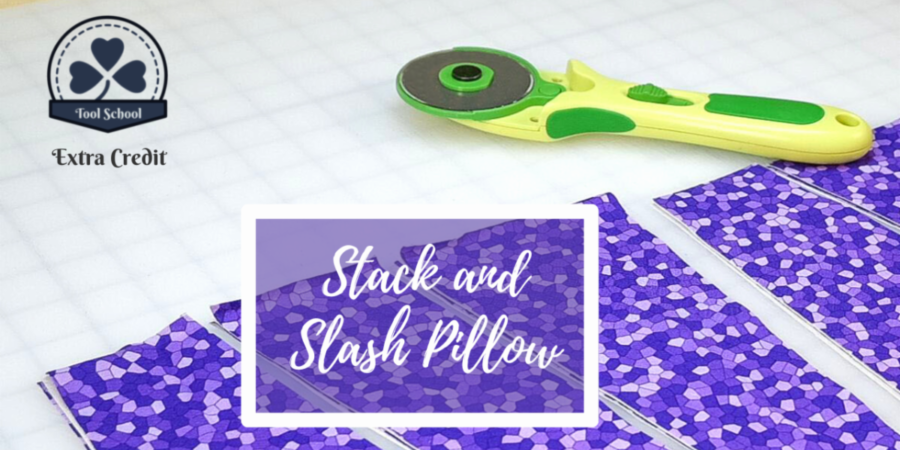
This month’s Tool School Extra Credit focuses on that wonder of tools, the Clover Rotary Cutter. We have three sizes of the Clover Rotary Cutters in our studio. Three above our big cutting table, one on the smaller cutting table, and one 45mm in our portable studio kit. The project video for this month features the 60mm rotary cutter that makes easy work of multiple layers of fabric used for our Stack and Slash Pillow. What a name, right? Just wait… you’ll see why…
Projects like this are born from our desire to use up scraps, odd cuts, and singular fat quarters that we have collected over the years. You know the ones; those special fabrics purchased because they were on a flat folds table or part of a discontinued bundle of fat quarters (who can pass those up when they are on sale??) that you just never end up using in a project because there isn’t enough fabric to do anything substantial with. Well… how about a throw pillow? Specifically, our Stack and Slash Pillow!
This project uses improv piecing techniques with just enough guidance so you can have some creative freedom in your colors and shapes. It’s as easy as “Stack, slash, swap, sew, stack, slash, insert (sorry, no s here), sew, square, sew, stuff, and fluff…” Yea that sounded easier in our heads…Truly this is a quick project that gives you either a one-of-a-kind two-sided pillow OR two matching pillows.
Check out our process video and follow the step-by-step instructions below to make your own version of the Stack and Slash Pillow then share your versions with us and with Clover on social media.
What you’ll need
TOOLS
Clover Rotary Cutter
Clover Wonder Clips
Clover Patchwork Scissors
Clover Point-to-Point Turner
MATERIALS
2 Fat quarters cotton fabric – Contrasting colors or patterns
8 pieces of scrap fabric that coordinate with the fat quarters. (4 in one color – 4 in another) 1.5″/4 cm wide and roughly 8″/20 cm long One 16” Pillow form or Pillow Stuffing
Sewing machine with neutral thread
Hand sewing needle and thread

INSTRUCTIONS
STACK – Stack your fat quarters
· Stack your fat quarters on top of one another.
· Use your Clover Rotary Cutter (with a fresh, sharp blade) to cut the stack into one 18″ square.
· Leaving the large squares on top of one another, cut the squares in half into 4 equal sections, vertically and horizontally.
You will end up with 8 – 9″ squares
· Stack the smaller squares in 2 stacks.
Don’t sort by color, just grab each set of squares, and stack them
SLASH – Make your first set of slashes
· Using a straight edge or ruler, make 2 cuts lengthwise across each stack. Each stack will be cut into 3 long sections.
Slashes should be slightly angled and random, i.e. slashes in stack A will not match the slashes in stack B
SWAP
· Grab stack A and swap out alternating colors from the cuts making 4 unique squares of alternating colors.
In our example we swapped out the purple center cuts with the off-white centers.
· Repeat for stack B
SEW
· From stack A Place one center piece from one of the squares on the left piece right sides facing.
· Use a Wonder Clip to mark the edge to be sewn
· Sew together using a 1/4″ seam allowance
· Press the seam
· Sew the right side to the assembled block
· Press again
· Repeat to finish all blocks in stack A
Set aside stack A
· Repeat for Stack B

STACK – again
· Stack all the assembled blocks from stack A
SLASH – again
Make a single slash across the stack in the opposite direction from before.
INSERT
· Insert a 1.5″ wide scrap of fabric in a contrasting color or pattern.
· Repeat for all 4 blocks in stack A
SEW
· Sew in the insert into each block using a ¼” seam allowance.
Repeat steps 5-8 for stack B
Lay out the blocks
· Using stack A, lay out the blocks in a clockwise pattern making a larger square(ish).
· Turn each block 90° as you lay them.
SQUARE- Square up the center lines
· Using a straight edge or ruler square up the center lines both vertically and horizontally.

SEW – Assemble the pillow top
· Sew the 4 squares together
· Sew each left and right piece together along the center seam
· Sew the bottom and top together being sure to match up the center seams.
SQUARE – Square up the pillow top
· Using the inside seams for guidance, square the edges of the pillow top to 15″
Repeat steps 10-13 for stack B
SEW – Finish the pillow.
· If you are making a double-sided pillow
· Place the two 15” squares on top of each other Right sides facing.
· Sew 3 sides closed and a few inches of both the right and left sides of the 4th side. This leaves an opening for stuffing the pillow.
If making two one sided pillows
· Cut 2 squares of fabric 15” to use as the pillow back
· Place one front and one back on top of each other Right sides facing.
· Sew 3 sides closed and a few inches of both the right and left sides of the 4th side. This leaves an opening for stuffing the pillow.
STUFF and FLUFF
· Trim the corners close to, but not touching the sewn line
· Turn the pillow Right side out
· Use a Point-to-Point turner to make crisp corners
· Stuff with a pillow form or with pillow stuffing
· Hand sew the remaining opening closed
DECORATE YOUR HOME
· Make more pillows!
Have fun!
S&J
