Fork Pins
By the Shibaguyz
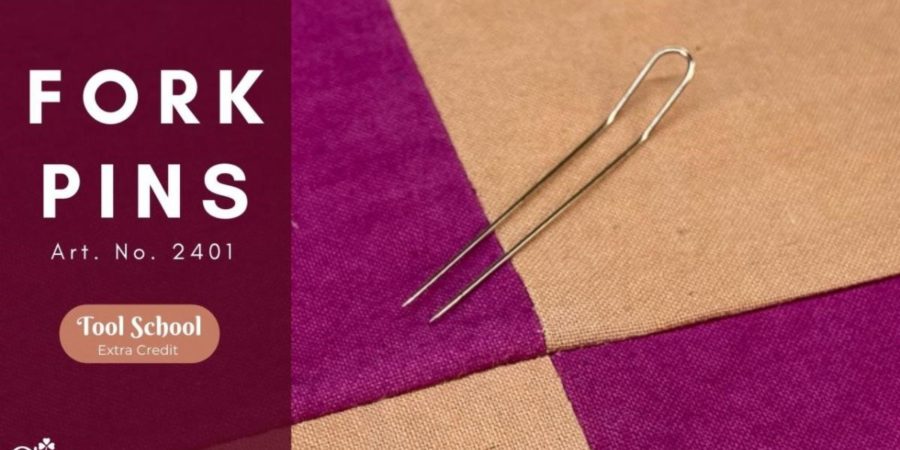
Pins are the ubiquitous tool of sewists, crafters, quilters, garment makers, crocheters, knitters… basically anyone who ever touches fabric will use pins, and use them often. Some pins tell you what they are designed for—like Silk Pins or Quilting Pins—others you must play with a while to find their best use. They all have their own unique characteristics that make them suitable for different uses.There is one type of pin that we keep close at hand as the secret weapon in matching up any seams. Particularly, when we need to have perfectly paired seams to create those razor-sharp matched corners in quilting. That indispensable tool of matching is the Fork Pins from Clover. Even with all the abstract fabric piecing and scrappy wonky quilt piecing we are known for it is still a necessity that the corners of our blocks match up perfectly in the final assembly of our fabric panels and quilt tops. Beautifully matched corners are one of the things that make beautiful quilts look polished and professionally sewn and it is the base that our improve and scrappy wonky fabrics sit upon that allows them to shine.It is the order to our chaos! Frankly when it comes to getting crisp corners straight pins don’t always do the job the way it needs to be done. Fork pins keep the seam steady and supported after everything is matched up, making crisp clean corners a breeze.Yup…we know…a lot of folks find the thought of having to match up corners in quilting daunting and we have met many crafter’s who just gave up trying and never quilted again. No more! Follow along and fear the four-point corner no longer…onward!

Here’s how we do it…
INSTRUCTIONS
1. Let’s say we’re sewing together 4 squares into a single block. This could be 4 pieced blocks that have been squared up, or maybe the first set of blocks going into a single 9-Patch block… the process is the same and thanks to the Fork Pins,the results are going to be beautiful every time.
2. We start by sewing 2 blocks together, then another 2 blocks together.
3. Press the seams opener to one side, whichever method works best for your finished quilt.
4. Lay the two pieces together Right sides facing and match up the center seam.

5. Here is where the magic happens…
a. Take a Fork Pin and insert it about 1/4″ from the edge with one arm of the fork on each side of the seam.It is important that you insert both forks of the pin straight into the fabric rather than at an angle.This will ensure the matched seam doesn’t

b. Once you have the forks inserted, check the back of the seam to ensure that the seam is still matched up and the arms of the pin are an equal amount away from the sewn seam.

6. Pin the remaining open seam to be sewn with quilting pins or use Wonder Clips, being sure that the edges match up perfectly.
7. Sew your seam removing the pins as they reach the needle. Take your time as you sew watching that the seam stays even under the sewing machine’s presser foot.
a. TIP: You can use the point of a stiletto or Curved Tailor’s Awl to pull the Fork Pin out as you reach that part of the seam.
8. Open your 4 sewn blocks and press open the seam.
a. Check from the front – you should notice that the corners of all 4 blocks are perfectly aligned! WOOHOO!!!
