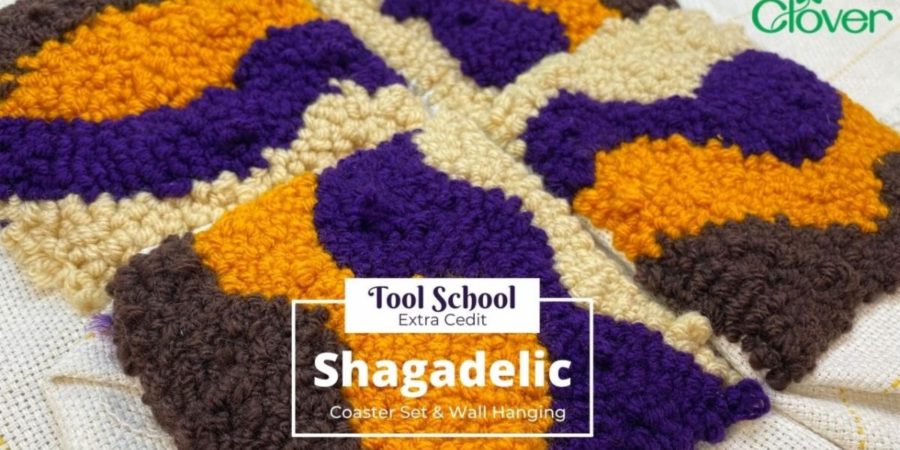
Shagadelic
Coaster & Wall Hanging
By Shannon and Jason
A throwback to an earlier time… when boots were made for walking and Tina told us about love river deep and mountain high.
What better way to get your groove on than by making your own set of Shagadelic coasters… or better yet, take those coasters and turn them into a wall hanging. Take your favorite colors of yarn, some rug cloth, the Clover Punch Needle and Punch Needle Hoop, add a little bit of flower power and you are well on your way to making your own home décor that is out of sight. Our advice, rack up a stack with Dusty Springfield, the Archies, and Sly & the Family Stone and let the funky groove inspire you.
A word about this version of the Clover Punch Needle Hoop… we truly love it. The old hoops were fine but this one features the addition of optional feet for greater stability when hooping your fabric and working on your punch needle creations. In addition, the ring grips the monk’s cloth so securely that we didn’t have to do nearly the amount of re-tensioning we were accustomed to. If you’ve been put off by punch needle hoops in the past but think this project looks groovy bay-bee, give it a try. It’s worth it.
And the punch needle tool? We love the improved version of the spacers that lock into place to adjust the length of the shaft of the tool for longer or shorter loops. The tool is easy to load with yarn and is large enough to hold a bulky weight yarn or two strands of worsted weight wool like we used in our shagadelic project.
All in all, we loved using both the hoop and the punch tool and our work went much faster than in the past simply because this design is superior to other kits we’ve used. Now… back to the Turtles and James Brown…
STITCH ON!! S&J

MATERIALS
- 4 Skeins of Medium weight yarn (CYC 4) – Colors of your choice
- Heavyweight Monk’s Cloth
- 3” of twill tape
- 4–4 1/2” squares of thin cardboard
TOOLS
- Clover Punch Needle Pen (item 8816)
- Clover Punch Needle Hoop (item 8817)
- Clover Fabric Marking Pen (item 5013)
- Scissors
- Rotary Cutter
- Glue Gun

INSTRUCTIONS
1) First Cuts
- Cut squares of Monk’s Cloth roughly 10” wide.
- There should be a couple of inches excess fabric hanging outside the Punch Needle Hoop.
2) Mark it Up
- Draw around a 4 1/2” square template to mark where your motif will appear.
- Inside each square draw 3 wavy lines from the top of the square to the bottom.
- The bigger and more dramatic your waves the better your tile will come out.
3) Get Punchy!
- Follow the directions included in the Punch Needle Hoop and the Punch Needle.
- Make each of the four section of your tile a different color.
4) Lock it Down
- Turn your tile Right side down and cover the back with glue.
- Place a piece of cardboard on top of the glued back.
5) Wrap it Up
- Trim the excess fabric from the edges down to 1/2″
- Trim the corners off the backing fabric
- Glue along the edge of the cardboard backing and fold the backing fabric over the edge.
- Trim the corners as needed to neaten up.

If you are making coasters, you can stop at this point… continue to step 6 for a wall hanging. Warning: If you are going to make the wall hanging, you should hide the project from your coffee mug toting friends… I mean… spouse.

6) Joining
- Decide on the placement of your tiles.
- Using your hot glue gun, glue two tiles together along the side.
- Hold them together tight as the glue cools.
7) Hanging Around
- Once all 4 tiles have been glued together turn your wall hanging Right side down and glue on the twill tape along the top edge to act as a hanging fixture.
8) Hang your wall art and enjoy!
