Bracelet Maker
Visible Mended Woven Patch
By the Shibaguyz
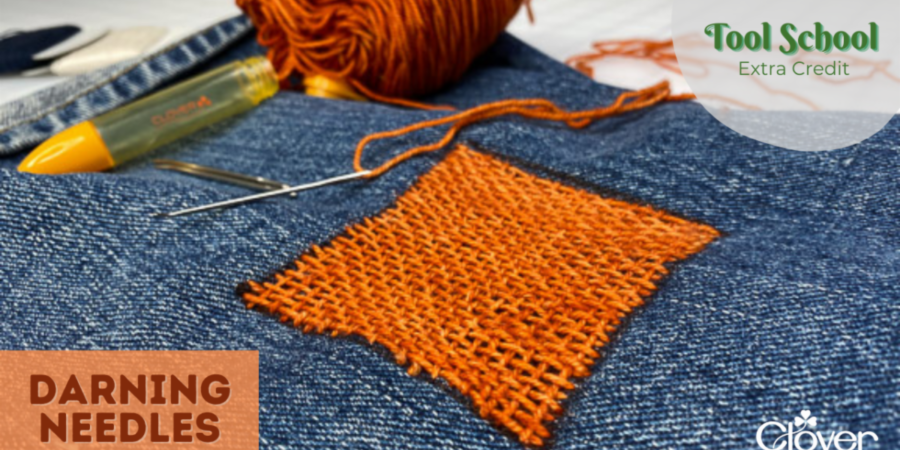
Visible Mended Woven Patch
Visible mending is one of the hottest trends in fashion today. By utilizing simple stitching on top of worn, distressed, or even new garments it’s easy to create a fashion statement that is singular to your style. As proponents of zero waste fashion we love the idea of giving old worn items a new life by adding stabilizing stitching or colorful patches. It’s good for the environment and great for the pocketbook!
The weaving we do for this patch is a basic over 1 under 1 weave using one color of thread. Start with this basic patch then build from there using multiple colors. If you are adept at woven patterns you can easily weave fancy patterns plaids, checks, or houndstooth with a little time and practice.
We show this used as a square patch, but circles, and ovals are a lot of fun too! Have fun with this! Use colors you like and save your jeans to wear for yet another day!

MATERIALS
Garment to be patched:
Your choice: Denim jeans, shirts, even jackets can all be patched this way.
Thread/yarn:
Again, your choice: Fingering weight yarn, embroidery floss, perle cotton, or crochet thread all work nicely. If you can sew with it, you can use it as a patch.
TOOLS
Clover Darning Needle Set – Bent Tip (No. 3121)
Based on your material and the weaving thread for your project you can use any of Clover’s Darning Needles. They are available in 4 sizes
- Darning Needle Set (Art. No. 339)
- Jumbo Darning Needle Set (Art. No. 340)
- Darning Needle Set-Bent Tip (Art. No. 3121)
Lace Darning Needle Set (Art. No. 3168)
INSTRUCTIONS
1. Mark Your Patch Area
- Using a water soluble fabric pen draw any shape around your tear.
Be sure to leave at least a 1” gap from the edge of the hole


2. Stitch The First Set of Rows
- Bring up your thread from the Wrong side along marked line.
- Leave a short tail on the back to tie off or weave in after you are done.
- Pull your thread across the patch area to the opposite side.
- Insert your needle, taking a very small stitch coming to the Right side again.
- The size of the stitch will vary based on your thread and base fabric. The goal is to have your rows as close together as possible without weakening the fabric.
- Pull thread across to the opposite side, again taking a small stitch next to where your thread originally came up.
- WATCH YOUR TENSION. The rows should just lay on the fabric softly and should not pull at all. If they are too tight when you weave the perpendicular rows your patch will pull in and pucker the fabric.
Continue this process making parallel lines across the marked patch area.

3. Stitch and Weave the Perpendicular Rows
- In the same manner as before, come up from the back to the front.
- Weave over 1 thread then under the next across the completed vertical row.
- When you reach the end as before take a small stitch (about the width of your thread) and weave back the opposite direction.
- Using the Bent Tip Darning Needle for this makes it easy to scoop up the threads… just FYI
- Continue this process making woven lines across the patch.
- End by taking your needle to the Wrong side of your work and tying off your thread.
4. Other Notes
- This patch looks great when you place it on the back of your hole and let it “peek” out through the tear.
- Use 2 colors of thread – one for the horizontal rows the other for the vertical- for a tweedy looking patch.
- Variegated thread are wonderful used for this!
