Tunisian Crochet Mug Rug
By the Shibaguyz
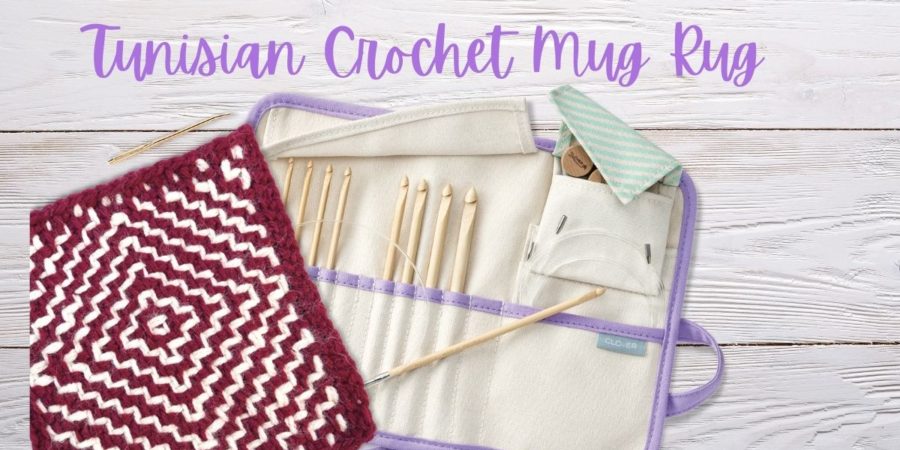
It should come as no surprise to most of you that we like to play with a lot of different types of crafting. We knit, crochet, quilt, sew, spin… you get the idea. Our general philosophy for our making and art is that all forms of art and craft inform one another; there are transferable skills from each form that support, enhance, and expand the others. When we were asked to create something using the Clover Tunisian Crochet Interchangeable Hook Set, this philosophy came to the surface again blending our sashiko skills with Tunisian crochet fabric. Specifically, we used a hitomezashi sashiko (a grid-based form of sashiko) stitch pattern and followed the “grid” created by Tunisian crochet simple stitch to create our project. Use it as a coaster or a mug rug… Ours is currently a mug rug in one of the windows of the studio where we often set our coffee cup or tea mugs.

Materials and Tools
- Clover, Interchangeable Tunisian Crochet Hook Set (Art No 3684)
- Clover, Jumbo Yarn Needle (Art No. 219)
- Clover, Patchwork Scissors (Art No. 493/CW)
MATERIALS
Yarn
We are using 2 colors of worsted weight yarn. One for the Tunisian crochet swatch, another contrasting color for the sashiko style embroidery.NOTE: You can use ANY yarn in ANY weight to make this project.
INSTRUCTIONS
Step 1: Stitch the Tunisian Crochet block
1) Use the Tunisian Simple Stitch to make a square block.
a) Using worsted weight yarn, we used 22 rows over 22 stitches. Your numbers may vary based on your yarn weight. The main thing is to make sure it is square.
2) Block your swatch. We use steam to block these small blocks out. Tunisian simple stitch will curl (see the video) so don’t freak out… just give the block a good steam and pin it out while it dries and you should have a beautifully flat block to work your sashiko-inspired pattern.
Step 2: Stitch the horizontal rows
1) Cut a length of yarn 2X the length you need.
a) We recommend no more than 2 yards at a time. More than that and you can easily snarl your yarn as you stitch.
2) Find the center row of your swatch and mark it. Then, find the center stitch of that row and mark it. This is where the center of your overall design will be.
3) Utilizing the holes already in the Tunisian crochet fabric on the top side of the marked center row, use a running stitch (moving forward in a straight line working your needle first over one stitch then under the next) to make a row of stitches from one side to the other.
4) Turn your work 180° and stitch across again one row below the first row. This row should be a “stacked” row of stitches meaning it will mirror the previous row in where the stitches are visible from the right side and where the spaces between them are.
5) Turn your work 180° again and stitch a row above the previous row. This row and all subsequent rows will be offset from the previous row meaning if there is a space in the row above, there will be a stitch in this row.
6) Continue in this manner until 1/2 of your swatch is stitched with offset rows and the 2 stacked rows in the center.
7) Repeat Steps 5 & 6 for the other half of the swatch, starting from the center and working to the other edge.
Step 3: Stitch the vertical rows
1) Turn your block 90°
2) Repeat 2-7 from Step 2
a) When you make your first 2 Stacked rows going this direction look for a “box” to appear in the center of the block. If the Box appears on the Wrong Side of your block, you can:
i) Turn the block over so the wrong side is now the Right Side
ii) Remove the stacked rows you just stitched and begin stitching 1 stitch in from where you began the first time (making stitches where you had spaces before).
3) As you work you will notice the pattern immediately developing. Read the stitches as you work to look for any skipped stitches or something that looks “funky”. If you spot something that looks wrong pull out that row and start again.
Step Final: Finishing
1. Weave in all your ends.
NOTE: If you don’t want to weave in the ends, you can leave them long as fringe along the sides of the mug rug… if you’re a fringe kind of person. 2. Give the mug rug a quick steam blocking to set the stitches.
