If you all have seen our previous blog posts and Tool School Extra Credit projects, you know by now that we love a good embellishment! For this project, we are going to be using the Mesh Transfer Canvas from Clover and let us tell you… it is so easy to work with.
Also, because it is clear, you can use it to trace an outline from any photo or printed design. Once your item is traced onto the canvas you simply place the canvas on top of your fabric and trace again using an erasable marker or chalk pencil. The tiny holes in the canvas let the marker bleed through to the fabric… and BINGO… your design appears on the fabric.
The Mesh Transfer Canvas is the perfect tool for quilters who draw intricate templates to sew, sashiko stitchers who want to print sashiko patterns and transfer them to fabric, punch needle enthusiasts, basically anyone who ever wanted to embellish… well… anything! If you can trace a line you can put it on fabric.
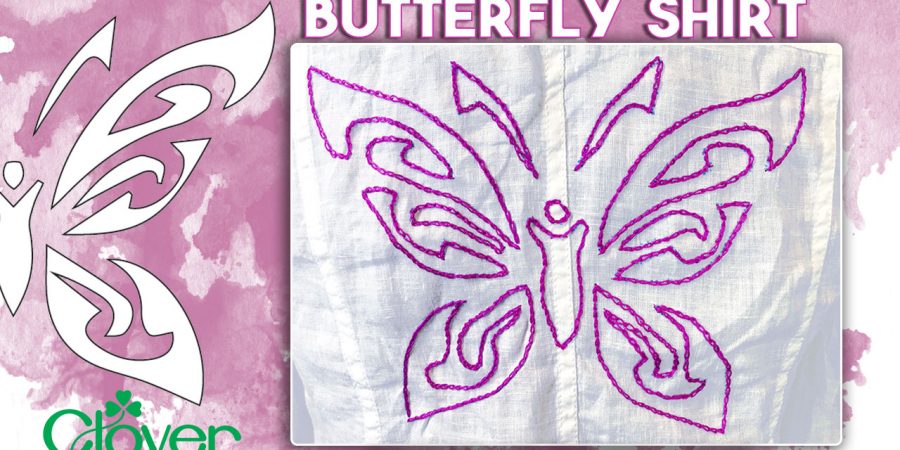
We tested the Mesh Transfer Canvas with one of Jason’s photos and came up with a FAB design that we will revisit later on. For this project, we used a butterfly tattoo design to embellish the back of a shirt jacket we upcycled from Eileen Fisher Renew.

NOTIONS AND TOOLS
-
Mesh Transfer Canvas – item 474
-
Permanent Marker
-
Water Soluble Marker – item 516 or washable marker
-
Embroidery Hoop – item 8813
-
Gold Eye Tapestry Needle or similar – item 238/24
-
Embroidery Floss – Aurifil Cotton Embroidery Floss
MATERIALS
For this project, we embellished the back of a garment. We chose a white shirt… you can use anything you like (garment, pillowcase, kitchen towel…)

Download printable PDF here
INSTRUCTIONS
Step 1. Print Out a Template
This can be anything that can be printed; a photo of your cat, tattoo art, your own line drawings. (Note: please respect copyright law and refrain from selling images you don’t own.)
We recommend using something that has strong lines or edges and, for your first project, lines that are set far enough apart to make your lines of stitches stand apart from one another.

Step 2. Trace your image onto the Mesh Transfer Canvas.
-
Use low tack tape to secure the printed image to your drawing surface.
-
Lay the Mesh Transfer Canvas on top of the image and tape it down as well.
-
Trace the image with a permanent marker.
-
You can use a pencil and erase the image later if you only plan on using the image once.

Step 3. Select the item to embellish.
-
Lay the Mesh Transfer Canvas on your fabric and adjust placement as needed.
-
Pin or tape the Mesh Transfer Canvas to keep it in place.

Step 4. Trace the image on to the fabric.
-
Using Clover’s Water Soluble Marker or chalk pencil trace the image.
-
Since you are tracing from the front of the Mesh Transfer Canvas through to the front of your fabric you don’t need to reverse the image. If you plan to transfer the image to the wrong side of the fabric, simply turn the Mesh Transfer Canvas over to reverse the image.
-
If you are transferring this image to multiple locations, un-pin and move the Mesh Transfer Canvas and trace again.

Step 5. Sew your embellishment.
-
We chose to outline our butterfly with chain stitch. Feel free to use any stitch you like. You can even use your sewing machine to stitch around the transferred image and fill in the spaces between the outlines.